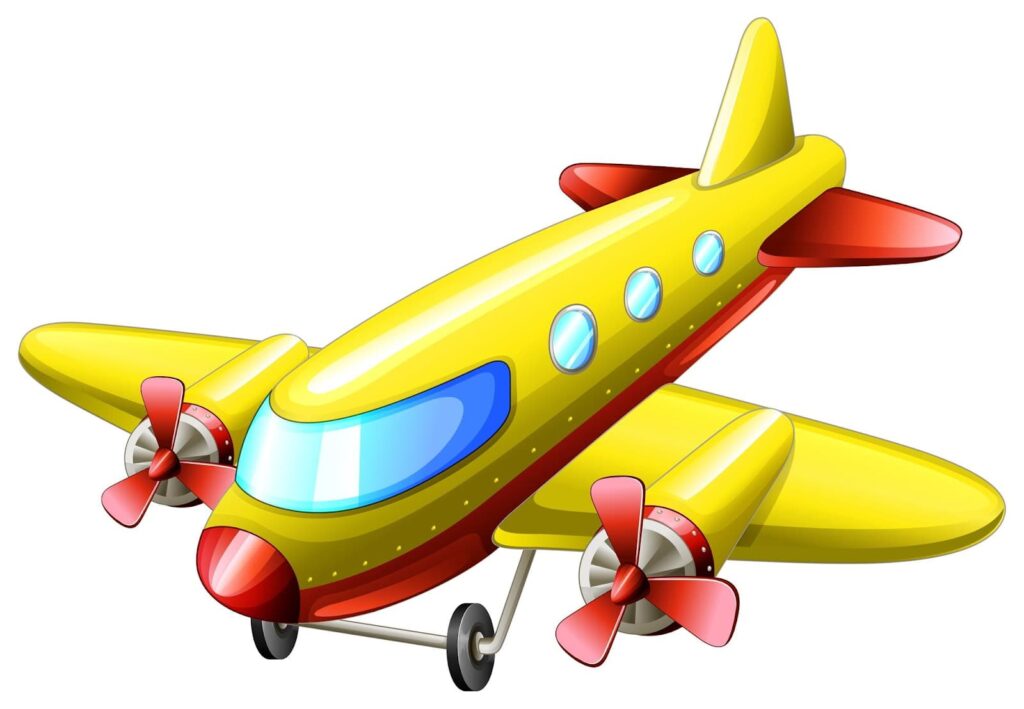
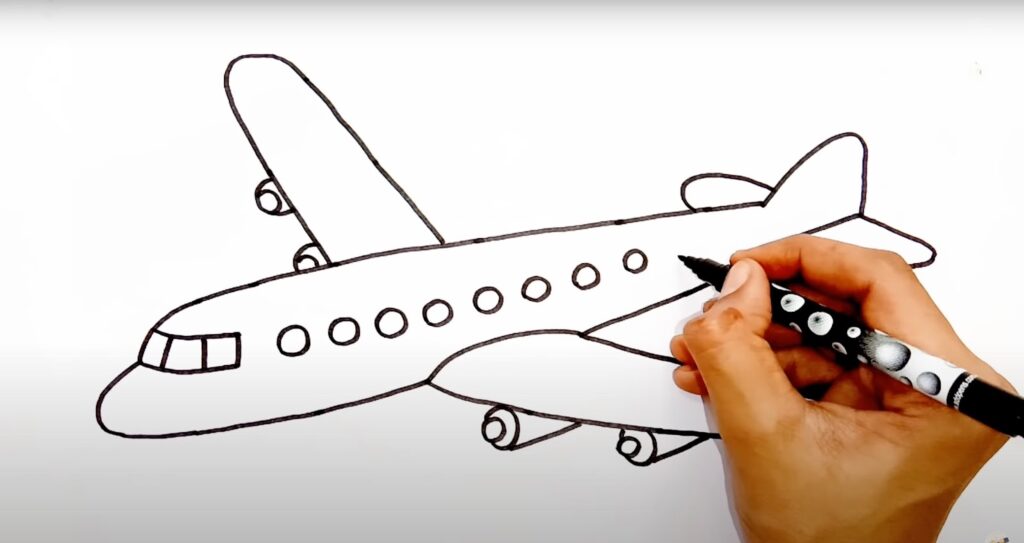
Air travel has revolutionized the way we connect with the world. From being a time-consuming endeavor, it has become an efficient means of transportation. In celebration of this incredible technological marvel, let’s embark on a creative journey to learn how to draw a cartoon airplane. By the end of this tutorial, you will have all the tools you need to create an impressive picture of an awesome airplane, complete with your own unique backgrounds and extra details. This step-by-step guide will take you through the process in just 6 easy steps!
How to Draw A Cartoon Airplane – Let’s get Started!
Drawing a cartoon airplane can be an exciting and rewarding experience. Whether you’re an aspiring artist or just looking for a fun activity, this step-by-step guide will help you bring a cartoon airplane to life.
Step 1: Begin with the Front Section of the Aircraft
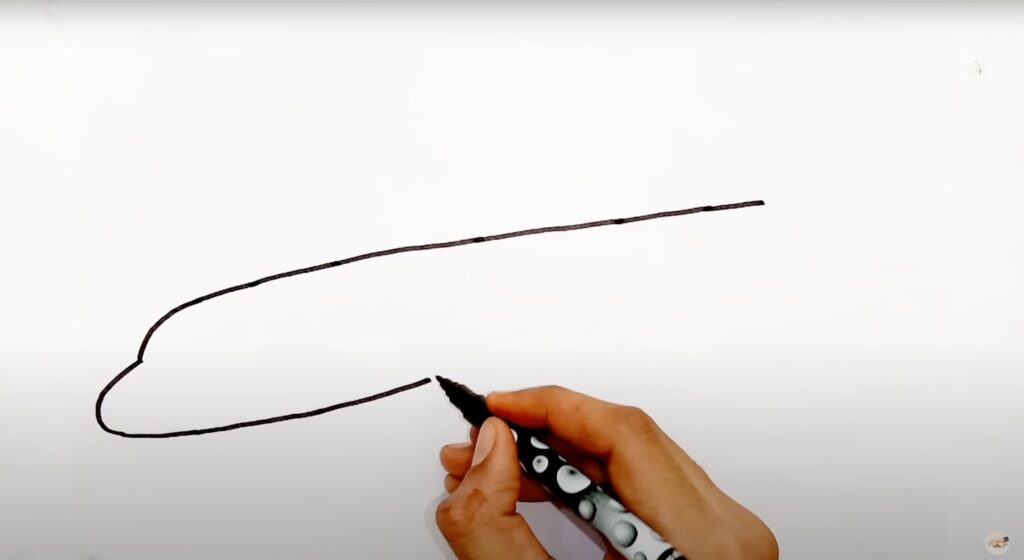
To start off, let’s focus on drawing the front section of the airplane. Despite its cartoon nature, maintaining realistic proportions is essential. Utilize curved lines that interconnect to form the front and top of the airplane. At this stage, refrain from adding intricate details; those will come later in the process.
Tips for Drawing the Front Section:
- Use light, initial strokes to outline the basic shape of the front section;
- Pay attention to the curvature and symmetry of the lines to ensure a balanced appearance;
- Keep the lines faint until you are satisfied with the overall shape before finalizing them.
Once you’ve successfully outlined the front section, move on to the next step.
Step 2 – Draw the Tail of the Plane
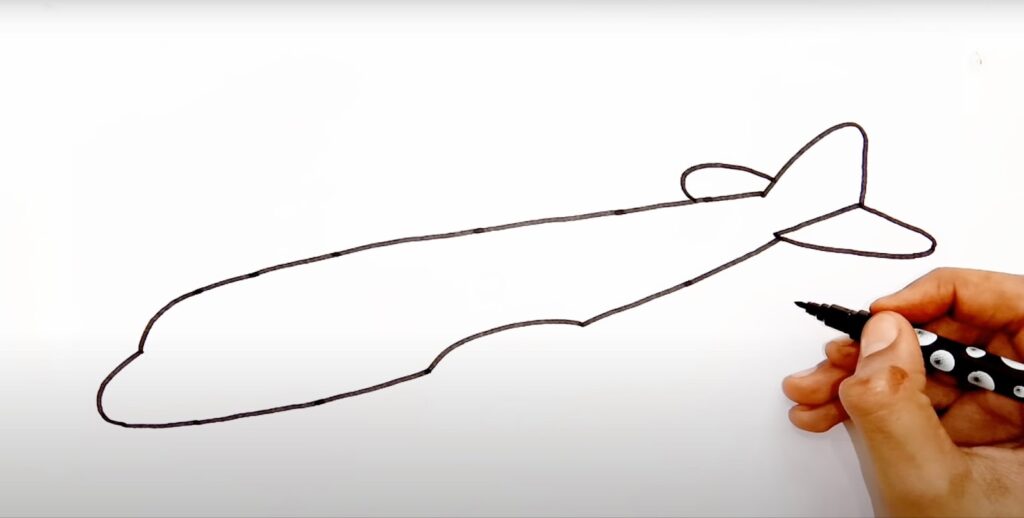
In this second step, our focus shifts to the tail of the plane. Begin by sketching the horizontal and vertical stabilizers, which are crucial components of the aircraft’s tail assembly. These elements contribute to the stability and control of the airplane during flight.
Tips for Drawing the Tail:
- Start by visualizing the size and placement of the tail in relation to the front section;
- Use simple geometric shapes as a foundation before refining the details;
- Ensure that the tail aligns with the overall proportions of the airplane for a cohesive look.
Now that the tail is in place, let’s proceed to the next phase of drawing the cartoon airplane.
Step 3 – Now, Draw the First Wing of the Airplane
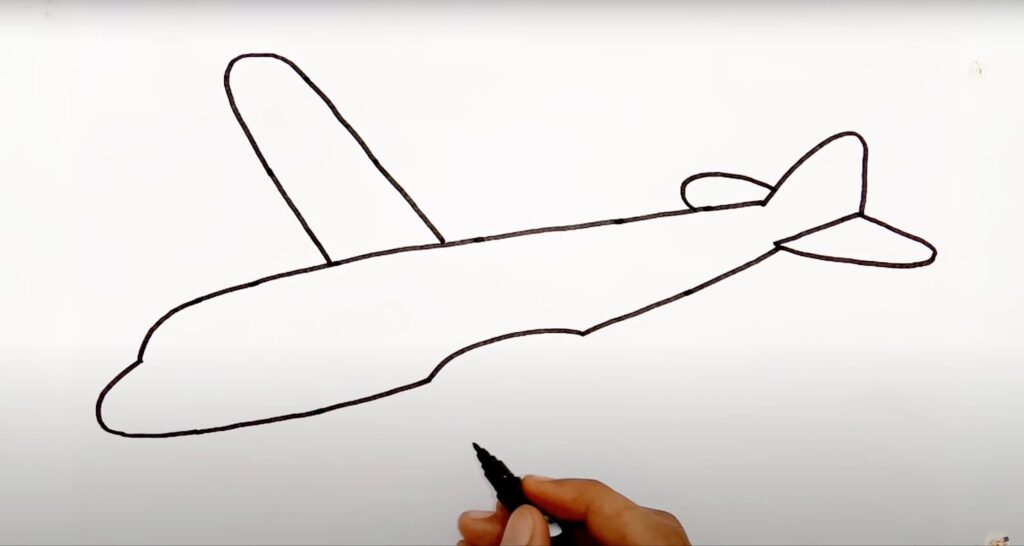
The wings are integral to the functionality and aesthetics of any airplane. As we progress, it’s time to draw the first wing of our cartoon airplane. The wing not only adds character to the aircraft but also provides lift during flight.
Tips for Drawing the First Wing:
- Consider the positioning of the wing in relation to the front section and tail of the airplane;
- Sketch the basic outline of the wing, paying attention to its size and curvature;
- Maintain consistency in line weight and style to ensure uniformity across the entire drawing.
With the first wing in place, let’s move on to the subsequent step to further enhance our cartoon airplane drawing.
Step 4 – Draw the Other Wing and Some Detailing

Completing the set of wings is crucial to achieving a well-rounded depiction of the airplane. Additionally, adding some detailing at this stage will bring depth and dimension to the drawing.
Tips for Drawing the Other Wing and Adding Detailing:
- Mirror the size and shape of the first wing to maintain symmetry and balance;
- Incorporate simple yet effective details such as engine nacelles, windows, and other defining features of the airplane;
- Refine the lines and add depth to the drawing by incorporating shading or hatching techniques.
As the main structure of the airplane takes shape, it’s time to infuse personality into the drawing with the addition of final details.
Step 5 – Add in the Final Details of This Cartoon Airplane Drawing
Detailing plays a pivotal role in bringing the cartoon airplane to life. This step involves adding finishing touches and refining various aspects of the drawing to achieve a polished and professional look.
Tips for Adding Final Details:
- Focus on enhancing the overall appearance by refining the contours and adding texture where necessary;
- Pay attention to small elements such as doors, windows, and any additional features specific to the chosen airplane model;
- Experiment with different line weights and textures to create visual interest and depth within the drawing.
By now, your cartoon airplane drawing should be taking shape, ready for the final step that will bring it to completion.
Bonus: Make This Airplane Drawing Easier With These Tips
Drawing a cartoon airplane can be simplified with a few handy tips and tricks. Here are some additional pointers to streamline the drawing process and enhance your artistic experience:
| Tips for Drawing a Cartoon Airplane |
|---|
| 1. Begin with light, preliminary sketches to establish the basic structure of the airplane. |
| 2. Use reference images to gain insight into the specific features and proportions of different airplane models. |
| 3. Experiment with different styles and variations to personalize your cartoon airplane drawing. |
| 4. Practice drawing basic shapes and forms to improve your overall proficiency in sketching airplanes. |
Implementing these tips will not only make the drawing process more manageable but also elevate the quality of your artwork.
Step 6 – Finish off Your Cartoon Airplane Drawing with Some Color
Color adds vibrancy and visual appeal to any drawing. Applying color to your cartoon airplane will breathe life into the illustration and accentuate its distinct characteristics.
Tips for Adding Color:
- Choose a color scheme that complements the overall theme and mood of the drawing;
- Apply colors strategically to highlight specific areas and create depth within the illustration;
- Experiment with different mediums such as colored pencils, markers, or digital tools to find the most suitable option for your drawing.
With the application of color, your cartoon airplane drawing will reach its full potential, ready to soar off the page.
Conclusion
In conclusion, learning how to draw a cartoon airplane can be an enjoyable and fulfilling endeavor. By following this comprehensive step-by-step guide, you’ve gained valuable insights into the intricacies of creating a captivating cartoon airplane drawing. From establishing the basic structure to adding final details and color, each step contributes to the overall appeal and authenticity of the artwork. Whether you’re a novice or seasoned artist, this guide equips you with the knowledge and skills to bring your imagination to life through the art of drawing. So, grab your drawing tools and embark on this creative journey to craft your very own cartoon airplane masterpiece!